Sunday, March 2, 2014

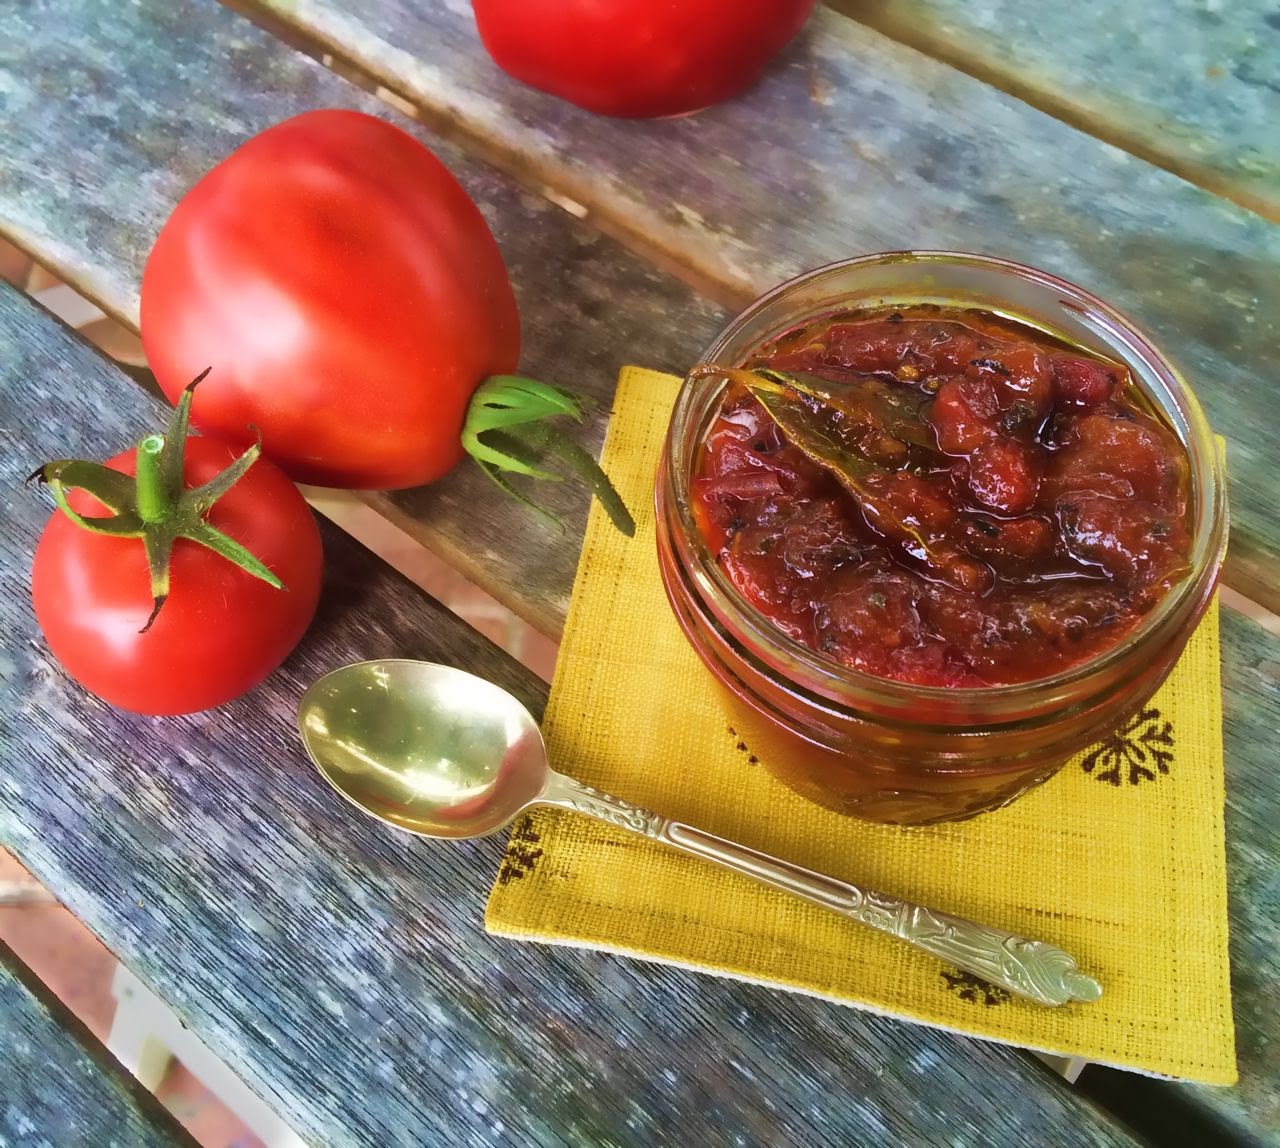
Tomato Chutney in a hurry


Sometimes I can't face banging around with pots and pans and sterilizing and labelling - all those things that precede a glittering array of sealed jars of bottled fruit and preserved chutneys to see you through the winter.

For those of us who want the tastiness of a spicy tomato chutney without all the fuss, this is a quick and easy recipe adapted slightly from Anjum's New Indian cookbook.   It's been great for using up our little crop of garden tomatoes - especially good smeared over a sandwich or on top of  crackers and our local Mercer cumin gouda cheese.  I've also used it as a relish for corn fritters or add it to spice up a sauce.

It usually takes the two of us some time to polish off a jar of chutney but this one's been so popular that I ended up making another batch after we'd scoffed the first lot in record time.

Adjust the chilli flakes to how much heat you want - I used 1/4 teaspoon the first time, but upped that to 1/2 teaspoon for this last batch for a bit more fire.

Tomato Chutney

Makes 1 small jar 

1 tbsp olive oil
1 bay leaf
1 tsp mustard seeds
1/4 - 1/2 tsp chilli flakes (or dried chilli)
2 large tomatoes, chopped
1/4 tsp turmeric
salt (1/4 to 1/2 tsp - adjust to your own taste)
4 tsp sugar
1 1/2 tsp sultanas
1 tsp fresh ginger, finely grated
1 tsp red wine vinegar
50ml water

Heat the oil in a medium sized heavy based saucepan.  Add the bay leaf, mustard seeds and chilli flakes and cook until the mustard seeds start to pop.

Add the tomatoes and turmeric and stir for a few minutes until soft.  

Add the remaining ingredients, bring to the boil and then simmer for 5-7 minutes until thickened slightly.

Cool and place in a sterilized jar (the only amount of fiddling you'll have to do).  Keep in the fridge and use within 7 days. Not hard really.


Sunday, February 23, 2014

Date & Walnut Loaf


I have loved Date & Walnut loaf for a very long time but, with a nut allergic child in the house, it hasn’t been on the menu for a while. 

Now that the bird has flown to its own little nest, I still feel incredibly guilty for reintroducing nuts into the house.  I didn’t realize how much I missed them until I found myself dropping mini packets of peanut M&Ms (I’m not sure I actually like these but they’re so moreish) and the odd jar of crunchy peanut butter into my shopping cart, much to the chagrin of the Irish one who maintains a fierce loyalty to no peanut butter but somehow doesn’t apply it to buying bags of fresh nuts for snacking.  Go figure.

The Irish one may prefer his Barm Brack which is nice, but I think the sweet stickiness of the dates against the crunch of the walnuts make this my favourite tea loaf.

Date & Walnut Loaf


225g stoned dates, chopped
1 tsp bicarbonate of soda
a pinch of salt
300ml hot water
275g self-raising flour
100g butter, chopped into pieces
50g shelled walnuts, chopped
100g soft brown sugar
1 egg, beaten

Grease and line a 1kg loaf tin. 

Preheat the oven to 180°C.

Place the dates, bicarbonate of soda and salt in a bowl and pour over the hot water.  Set aside until cool.

Sift the flour in a bowl.  Add the butter pieces and rub into the flour until combined.  Stir in the walnuts and sugar until thoroughly combined.

Mix the dry ingredients into the cooled date mixture and beat in the egg. 

Pour the mixture into the loaf tin and bake for 1 to 1¼ hours or until a skewer inserted in the centre comes out clean.

Turn the loaf out onto a wire rack and leave to cool.

Store in an airtight tin.  The loaf keeps well and even improves with age!

And this gets shared for the first of this year's Sweet New Zealand treats hosted by Sweet NZ founder, Alessandra.


Saturday, February 8, 2014

Gazpacho


I’ll be the first to admit that this is cheat’s gazpacho made with tinned tomatoes not fresh, but when your own crop is nowhere near ripe and store bought are flavourless then I really am not going to apologize. If you’ve got tasty, ripe, fresh tomatoes go for it.

I’ve made this twice so far this summer.  First was Christmas Eve in Taranaki when I’d been rostered on for dinner on Day One.  Arriving at 3.30pm after a long drive from Auckland, I set about making it (after first refreshing with a cup of tea and slice of Christmas cake). I was under a bit of time pressure to chill the gazpacho down (yes, serves me right for using a cooked tomato sauce instead of fresh tomatoes!). In the end I poured small amounts to just cover the bottom of several ice cream containers and placed them in any fridge or freezer I could find and thankfully managed to get the soup to the desired chilled temperature. 

Having learnt my lesson, the second time was far easier as I made the entire soup dish at home, froze it and took it down with us early morning for a weekend in Tairua.  It was left to defrost during the day (out of the fridge), and reached perfect chill temperature just in time for dinner.  From there it was an easy assemble into glasses (I like to take these with me as I can’t always guarantee I’m going to find the right vessels at the holiday home).  It also won a gold star from me as the easiest, no-stress dish I’ve ever had to present at a shared meal.

The recipe is my adaptation and combination of two Jamie Oliver recipes – his Spanish Gazpacho from Jamie Does and his simple but wonderful tomato sauce from The Naked Chef, which I use for just about everything – pasta, pizza base, shakshouka et al.

For the gazpacho, I cook the sauce first and then, once chilled, add the additional elements for the soup.

It’s the perfect little starter for an outdoor evening meal or serve it at lunch with breads, cheese and antipasto platters.

Gazpacho

Basic sauce

1 tbsp olive oil
1 large clove garlic, crushed
½ - 1 red chilli, chopped & seeds removed or 1 small dried chilli, crumbled
2 tsp dried oregano
2 tins whole Italian cherry tomatoes (or Italian tomatoes)
½ tsp sugar
1 tbsp good quality balsamic vinegar
a handful of fresh basil or marjoram or Italian parsley (or combo of two)
salt & freshly ground pepper
1 tbsp good quality extra virgin olive oil

Additional elements to make the Gazpacho 

¼ of a day-old ciabatta loaf (250g)
1 tsp harissa (I use Greg Malouf Red Harissa)
¾ Lebanese cucumber, peeled, roughly chopped
1 red or yellow pepper, deseeded & roughly chopped
splash olive oil
splash balsamic vinegar

To serve

finely chopped red pepper
fresh herbs
extra virgin olive oil
good balsamic vinegar
sea salt & freshly ground pepper

For the tomato sauce


In a thick-bottomed pan, gently fry the garlic with the olive oil, then add the chilli, oregano and tomatoes.  Mix gently, being careful not to break the whole tomatoes (according to Jamie, this will make the sauce slightly bitter).

Bring to the boil and simmer gently for 1 hour.  Stir in the balsamic vinegar and sugar.  If you’re using as a sauce only, either chop or use a potato masher and crush the tomatoes into the sauce. Add the herbs.  Season well to taste and stir in the extra virgin olive oil.

Use as a sauce or leave to cool for the following Gazpacho recipe.

For the gazpacho


Slice the bread and remove crusts.  Place in a bowl with 100ml cold water for about 5-10 minutes.

Place cooled tomato sauce mix in liquidizer or food processor and whiz.  Squeeze the water from the bread and add the bread, pepper, cucumber, harissa and a splash of cold water to the bowl and whiz again.  The colour will change to a more pinky-orange because of the bread.  Add more water if required to get to the right “soup” consistency.  Adjust seasoning to taste.  Add more sugar if necessary. Either place in a covered jug in the fridge to chill or freeze. 

Serve at chilled temperature in soup bowls or glass (I prefer glasses). 

Drizzle the top with good quality extra virgin olive oil and balsamic vinegar (or sherry vinegar, if you have it).  Garnish with finely chopped red pepper and finely chopped fresh herbs e.g. basil, thyme, marjoram, Italian parsley.

I offer teaspoons, but it can be either spooned or sipped from the glass.
Thursday, January 16, 2014

Irish Soda Bread


I was going to head this Bread for tired people.  Perhaps it was just the relief of Christmas and New Year being over.  Whilst I don’t want to sound like the Grinch   - “and the more the Grinch thought of what Christmas would bring the more the Grinch thought ... I must stop this whole thing” - I do love Christmas and the whole family thing, but the run-up to Christmas had left me stressed, closely followed by plain, just tired (and I know I'm not the only one).

But, on the first day of a new year, my inner Earth Mother was glowing warm and mellow with thoughts of baking bread and I began to unwind (in a good way). 

It had to be simple though, so a no-knead soda bread was the chosen one and luckily I just happened to have buttermilk in the fridge as I'd used a little in a dressing the previous night. 

I started on it after a breakfast with my sister and her partner who had stayed overnight on a break on their drive down to Tongariro National Park.  It’s an insanely casual thrust of ingredients into a bowl, a quick bring together, shape, rest awhile (you and the bread), into the oven and it's done. 

The visitors weren’t around to sample the results but I guess if they’d smelt the bread baking they might have been tempted to hang around a bit longer and I may have gotten the chance to redeem myself at Scrabble.

Although soda bread is best eaten on the day, it does toasts up well the next day – cut in thick slabs and slather with good butter.  The Irish one, of course, loves it.


Irish soda bread


500g plain (standard) flour
1 tsp bicarbonate of soda
1 tsp salt
420ml buttermilk

Line a baking tray with baking paper and dust with flour.  Set aside.

In a large bowl, sift in the flour, salt and bicarbonate of soda together and stir to combine.

Pour the buttermilk into the mixture and, with your hand, bring it together to a dough. Transfer to a lightly floured surface. 

Don’t knead the bread, just gently roll it together and shape it into a smooth round by turning it on the board between your cupped hands.  Flatten it gently with your hand.  

Using a large knife, score the loaf to make quarters, cutting almost to the base (but don’t cut through) to make a cross on top.  Gently ease the quarters apart (you will probably need to flour your hands to do this or use a pastry scraper).  This allows the heat to reach the centre of the bread (or the fairies to get out).

Heat the oven to 200°C, leaving your bread to do its thing while the oven heats up.

Bake the loaf for approximately 30 minutes or until golden brown on top.  When tapped on the base, it should sound hollow.

Transfer to a wire rack to cool.


Monday, January 6, 2014

Orange blossom & pistachio shortbread crescents


These were another of my Christmas bakes that didn’t make the post before Christmas deadline (self-inflicted and unrealistic deadline so doesn’t really count, does it?). 

They do look very festive with their dusting of snowy icing sugar, but they are so melt-in-the mouth gorgeous you would not want to limit your tasting to just once a year, believe me. 

I have been pestering one of our book club members for his wife’s recipe for a similar biscuit.  I’ve decided it’s either a secret recipe not to be divulged or he has forgotten, so I set about looking for something similar.  I feel like I have hit gold with this one. They could easily be my favourite biscuit with their oh-so-delicate flavour and texture and crunchy bites of nuttiness.

If you can’t be bothered shaping them into crescents – which is rather fiddly I admit and, as you can see, mine are more large and rustic than perfectly formed – I am sure little rounds would taste just as good. 

Orange blossom & pistachio shortbread crescents

200g butter, softened
¼ cup caster sugar
1 egg yolk
½ tsp vanilla essence
1 tbsp Limoncello
½ tsp ground cardamom
¼ cup shelled pistachios, chopped finely
1½ cups standard flour
½ tsp baking powder

For the topping

2 tbsp Limoncello
1 tbsp orange blossom water
¾ cup icing sugar


Preheat oven to 160°C. Lightly grease a couple of baking trays or line with baking paper.

With an electric beater, beat the butter and sugar until pale and fluffy.  Beat in the egg yolk, vanilla, one tablespoon of the Limoncello and the cardamom and pistachios.

Sift the flour and baking powder into a bowl and then stir into the wet mixture to combine.

Spoon out about one tablespoon of the mixture at a time and roll on a lightly floured board into a tube shape about 5-6cm long and 2cm wide.  Place on the baking trays.  To get the crescent shape, I used a tiny round bowl (from my old tin of petit four tins and cutters below) turned upside down as a prop to mould each biscuit around to make a crescent and shaped the ends slightly (or just shape roughly with your hands).  Repeat for each biscuit.


Bake for about 20-25 minutes until pale, golden and firm to touch.  Remove from the oven and leave on the tray for 5-10 minutes.

For the topping, mix the rosewater and the Limoncello together and, using a pastry brush, brush the top of each crescent whilst still warm.  Once you’ve done this, dust all the biscuits with a good amount of sifted icing sugar and leave to cool on a wire rack.

Recipe adapted from one by Allyson Gofton in “Bake”


Alessandra has reminded me to enter these for Sweet New Zealand - a monthly blogging event created by her - and so I shall and here is the link.


Monday, December 30, 2013

Rocky Road


I am a recent convert to Rocky Road, having never really eaten it until two years ago when a really good batch was gifted to the office.  Since then I’ve meant to give it a go.  So when all thoughts of making preserves as Christmas gifts were no longer feasible time wise, I thought of these and speedily put a few bags together the night before dishing them out as Christmas offerings for work colleagues. 

The white chocolate bars are very festive looking but that is not to say you can't make them all year round.  You can always kid yourself they’re healthy with the pistachios and cranberries. 

I made the recipe twice, once with white chocolate and once with dark and then combined the two types in cellophane gift bags.  My preference was for the white chocolate both in taste and appearance.  I suggest using a good quality chocolate as it does make all the difference.

Of course this post was supposed to be pre-Christmas but I’m sure most of you will know that last-minute seasonal panic that normally occurs and will forgive me, especially if I leave you with this quote which I pinned earlier today from Pinterest and via this site. I think it fits the bill for the coming of a new year.


Be kind
work hard
stay humble
smile often
stay loyal
keep honest
travel when possible
never stop learning
be thankful always and
...love.


Rocky Road 

250g white (or dark) chocolate, chopped
1/3 cup shelled pistachios
½ cup dried cranberries
100g marshmallows (if you're using the bigger ones, chop if you wish)

Grease and line a baking tin or Pyrex dish (approx. 15cm x 20cm), leaving an overlap of baking paper for easy removal.

Put the chocolate uncovered in a microwave safe bowl.  Microwave in bursts of 30 seconds (stirring after each burst) for about 1-2 minutes or until melted and smooth.

Mix the pistachios, cranberries and marshmallows in a large bowl.  Add the melted chocolate and stir to combine.

Press the mixture into the tin and refrigerate for about 2 hours, or until set. Cut into squares, rectangles or chunks.

I served mine straight from the fridge (summer here).


Friday, December 13, 2013

Semolina, Coconut + Marmalade Cake


If you ever get fed up smelling the roses, try orange blossom water instead.  Gorgeous.  I’ve been inhaling the heady scent since dousing these cakes with it.  And in case that’s not enough, you can flavour the yoghurt with it too.

I took one of these loaves along to our December book club’s pot luck dinner. It was a lovely way to end our year of book club sessions – wine, food and conviviality.

The cake is about as simple as it can get – whisk the wet, stir the dry, mix together, pour into tins and bake.  It has that thick open texture you normally get with such cakes. The marmalade gives it a slight bitterness but it’s the orange blossom that gives it the edge in flavour and aroma.

Semolina, coconut & marmalade cake

From Jerusalem by Yottam Ottolenghi & Sami Tamimi

Makes two 500g loaves.  If you want to make a 1kg loaf, increase cooking time by a further 20-30 minutes.

180ml rice bran oil
240ml fresh orange juice
160g orange marmalade (fine cut or without peel)
4 eggs
grated zest of 1 orange
70g caster sugar
70g desiccated coconut
90g standard flour
180g semolina
2 tbsp ground almonds
2 tsp baking powder

Soaking Syrup

200g caster sugar
140ml water
1 tbsp orange blossom water


Preheat oven to 180°C/160°F. 

Grease and line two 500g loaf tins with baking paper.

In a bowl, whisk together the oil, orange juice, marmalade, eggs and orange zest until the marmalade dissolves.

In a separate bowl, mix all the dry ingredients and add to the wet.  Mix until well combined – it will be quite runny. 

Divide the filling between them.  Bake for 45-60 minutes, or until a skewer inserted in the middle comes out clean.  They should be orangey-brown on top.

Near the end of baking time, place the syrup ingredients in a small saucepan and bring to the boil.  Remove from the heat. 

As soon as the cakes come out the oven, brush them with the hot syrup using a pastry brush.  Do this several times, leaving the syrup to soak in before applying again, until all the syrup is used.  You’ll enjoy this as the perfume wafts into the air.

Once the cakes have cooled down a little, remove from the tins and leave to cool completely.

Serve with coconut yoghurt or Greek yoghurt flavoured with a drop of orange blossom water.


Like citrus?  Try my favourite lemon cake of all.