Showing posts with label preserves. Show all posts

Sunday, March 2, 2014

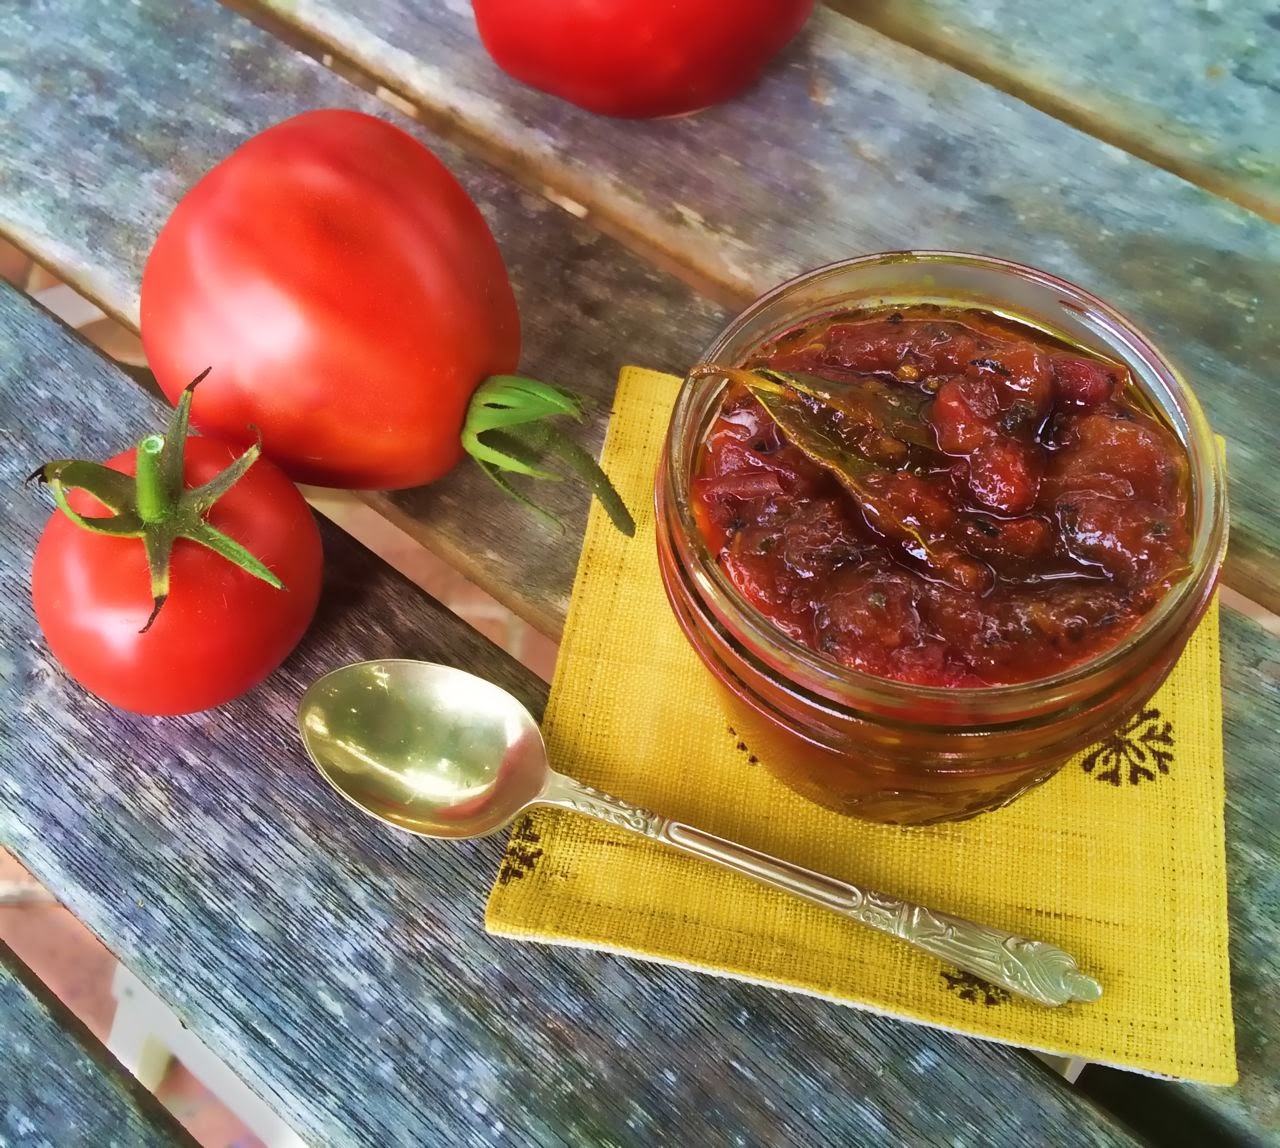
Tomato Chutney in a hurry


Sometimes I can't face banging around with pots and pans and sterilizing and labelling - all those things that precede a glittering array of sealed jars of bottled fruit and preserved chutneys to see you through the winter.

For those of us who want the tastiness of a spicy tomato chutney without all the fuss, this is a quick and easy recipe adapted slightly from Anjum's New Indian cookbook.   It's been great for using up our little crop of garden tomatoes - especially good smeared over a sandwich or on top of  crackers and our local Mercer cumin gouda cheese.  I've also used it as a relish for corn fritters or add it to spice up a sauce.

It usually takes the two of us some time to polish off a jar of chutney but this one's been so popular that I ended up making another batch after we'd scoffed the first lot in record time.

Adjust the chilli flakes to how much heat you want - I used 1/4 teaspoon the first time, but upped that to 1/2 teaspoon for this last batch for a bit more fire.

Tomato Chutney

Makes 1 small jar 

1 tbsp olive oil
1 bay leaf
1 tsp mustard seeds
1/4 - 1/2 tsp chilli flakes (or dried chilli)
2 large tomatoes, chopped
1/4 tsp turmeric
salt (1/4 to 1/2 tsp - adjust to your own taste)
4 tsp sugar
1 1/2 tsp sultanas
1 tsp fresh ginger, finely grated
1 tsp red wine vinegar
50ml water

Heat the oil in a medium sized heavy based saucepan.  Add the bay leaf, mustard seeds and chilli flakes and cook until the mustard seeds start to pop.

Add the tomatoes and turmeric and stir for a few minutes until soft.  

Add the remaining ingredients, bring to the boil and then simmer for 5-7 minutes until thickened slightly.

Cool and place in a sterilized jar (the only amount of fiddling you'll have to do).  Keep in the fridge and use within 7 days. Not hard really.


Saturday, January 12, 2013

Strawberry and Vanilla Syrup Jam


Any time I’ve considered making strawberry jam, the strawberries have disappeared before the thought has been put into action.  Last week, with the absence of the strawberry thief, I was finally able to take the fruit from punnet to jar.

I was so pleased I did.  The aroma from the strawberries bubbling away in the pot was, in itself, enough to send me into raptures but a spoonful or two straight from the jar has made me think I’d better bottle up some more of summer before it has gone.  Maybe some apricot jam too?

I like to make preserves in small amounts – less waste if it all goes wrong and easy and quick to do at short notice rather than spending the whole morning, afternoon or, god forbid, day in the kitchen surrounded by jars and jam-making equipment.  Increase the quantities if you are this kind of person (I admire you, really I do).

Strawberry and vanilla syrup jam 

500g (2 punnets) strawberries, hulled
1 tablespoon Equagold Tahitian vanilla syrup or 1 whole vanilla pod*
375g sugar
juice of half a lemon
1 teaspoon of butter

Makes 2 small jars

Have the jam jars ready and sterilized.  I normally wash mine in hot soapy water, rinse the jars and, still wet, pop them (jars only, no lids!) in the microwave for one minute.  Once washed, I rinse the lids with boiling water from a kettle.  I am not an expert on preserving and sterilization so check out one of the many websites available on the subject, such as this one

For a chunky, whole fruit experience, keep smaller strawberries whole and cut larger ones to the same size.  Place the fruit in a stainless steel or glass bowl and mix with the vanilla syrup and sugar.  Leave overnight in the fridge.  If using a vanilla pod, split the pod along the length with a sharp knife and scrape the seeds into the mix, along with the whole pod (remove pod after cooking).

The next day, remove the fruit and sugar mix from the fridge (I normally leave it at room temperature for about an hour before cooking).  Add the lemon juice and stir to combine. 

Place a small saucer in the freezer (for testing jam at setting stage). 

Transfer the fruit mix into a large saucepan and over a gentle simmer, heat until the sugar is completely dissolved. 

Turn the heat up and slowly bring to a rolling boil.  Take care the jam does not catch on the sides or bottom of the saucepan.  Cook until the jam reaches setting point. 

While it’s boiling a scum sometimes rises to the surface and can spoil the appearance of the jam.  To remove this, you can either:

  • use a metal spoon to skim off the scum (now there’s a nice phrase); 

or, (like me because I am lazy):

  • skip the skimming and stir in a small knob of butter.

After about 10 minutes of boiling, start testing to see if jam is set (you may need to do this a few times).  Put a small amount of jam on the saucer you have ready in the freezer.  Wait until it cools slightly then push the jam with your finger.  If it wrinkles as you push, it is ready.  Mine took about 15-20 minutes to reach this stage.

Once ready, pour into the hot sterilized jars.  If you have waxed discs, place these on top and cover with a lid.  Leave to cool.

And there you have it, summer in a jar.


Friday, July 27, 2012

luscious lemon curd


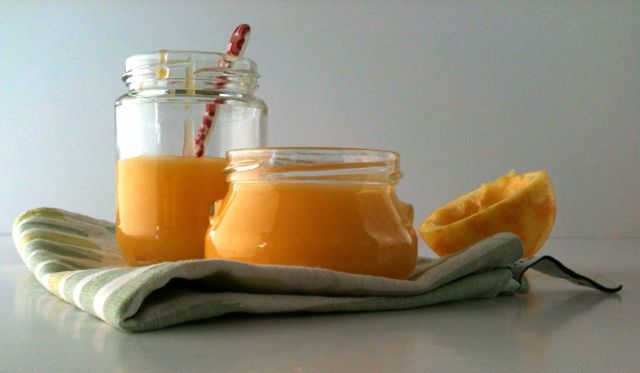
Lemon curd (also known as lemon honey) is so easy to make that if you haven’t made it before, you should really give it a go.  It can be cooked in a saucepan, but this microwave method is super quick and easy.

Although, I have lemon trees at home, they won’t be winning any beauty competitions with their gnarled, imperfect skins.  Their appearance kind of makes it difficult sometimes to get good-looking zest - and we all want good looking zest don’t we?  Well, yes we do in lemon curd, otherwise we get flecks of green and black in the jar, which ain’t so pretty.  So when a bag of unblemished lemons came into my being, I knew right away I would be making lemon curd and preserved lemons. I was assured the lemons were organic (really? They looked so perfect?).  

For a long time I only purchased lemon curd at craft fairs where little old ladies had probably been making it for years. Since I discovered it’s simple to make, I’ve been making it at home. This recipe comes from a grandmother, a former colleague, and is just delicious.

There are lots of things you can do with lemon curd.  The most temptingly obvious is spooning it direct into one’s mouth. In fact, it’s quite likely you’ll eat the whole jar.  I thought I was the only one with this weak trait, but a colleague told me she’d been doing the very same thing. 

Assuming you resist the temptation, try spreading it on toast, bagels, or fill sweet pastry tarts with it.  It’s divine swirled through vanilla ice cream or as a filling in sponges, muffins and cupcakes. I dolloped a teaspoonful on a slice of lemon, banana and sultana cake to lift its’ slightly dry texture.   Or just package up the jars pretty and give as a gift – the recipient will love you forever.

Next time, I’ll be writing about the lemon louise slice I made using the lemon curd.


lemon curd

6 eggs, well beaten
125g (¼ lb) butter, cut in chunks
500g (1lb) sugar
Grated rind of 2 lemons
Juice of 3 lemons, strained


Wash and sterilize about 4 or 5 glass jars (how many you will need depends on the size of the jars – I tend to use smaller ones).  I sterilize by washing the jars and lids in hot, soapy water, then rinse the jars while still wet and put them (without the lids) in the microwave for one minute.  Use boiling water from a kettle to pour over the lids to sterilize.

Place all the ingredients in a large microwaveable jug and stir.  Heat the mixture for 30 seconds in the microwave and stir again.  It will start off looking lumpy but should be smooth once heated and combined.  Continue microwaving in 30-second bursts, stirring in between, until the mixture has reached the correct consistency. You should be able to coat the back of a spoon with the curd.  Don’t overcook as it will set too hard.

Use the jug to pour the lemon curd into jars.  Leave to cool, then seal. 

The recipe was given to me in imperial measurements so I have added metric measures.  

Saturday, January 7, 2012

apple butter with sultana scones


It’s amazing how relaxed I am feeling after the assault of Christmas.  It shouldn’t be like that but it was and it is.  I swear I will do it differently each year but it always ends up the same – stress, stress, and more stress.  Enough.

In the oh so wonderful aftermath of rising late, pottering around and having the time to indulge, I am finally finding the peace again. 

Midweek, I made the decision to make sultana scones for breakfast instead of eating breakfast AND then baking AND eating scones for morning tea.  Yes, this is what I call post-Christmas lean eating!  There was a reason.  I have wanted to make apple butter for a long time and I have wanted to participate in Cookbook Sundays, since Sue at Couscous and Consciousness began hosting it a few months ago.  Two very good reasons.


I don’t know much about fruit butters. The first thing I learned was that apple butter does not contain butter.  The second was that I had imagined it would turn out to be a pale, apple sauce-type spread but it was much darker in colour and had the texture of a smooth chutney.  (It was supposed to be the consistency of room temperature butter but my effort was not quite as thick as that). 

Whether or not my first attempt was any good, I liked it.  I imagine it would go well with a good sharp cheddar cheese or a Brie, or served with cold meats especially ham and pork.  It kind of reminded me of a softer, runnier, more intense version of fruit paste. On the sweet side, it could accompany waffles or pancakes or, as I found, scones.  Versatile then.  I am sure some of you reading this will have lots of ideas on pairing apple butter and other fruit butters and I would love to hear some other ideas.


When I was trying to think of how I would eat it, I thought of the taste of stuffed, baked apples and came up with the idea of pairing the butter with sultana scones and I think it works.  Well, you know, it worked for me.

The recipe comes from a book The New Vegetarian Epicure by Anna Thomas, which I bought in Taranaki (New Zealand) many years ago and I am almost sure I have not cooked anything from it.  The bookshop called Simply Read was in a lovely little red building down by the surf coast – a wonderful place to visit.  I am not vegetarian but I do enjoy trying different recipes using vegetables.

This is why Cookbook Sundays appealed to me.  Not just finding a cookbook that I have used seldom (or not at all) and testing a recipe, but finding new things to try and interacting with a wider audience to learn more.

I made a smaller amount of the apple butter recipe given and found that the liquid evaporated so I topped it up.  I have posted the full recipe below (maybe you need to use the full amount so it won’t evaporate!?). 

For the scones, I just used a basic recipe and added some sultanas so they’re really just a pairing up for the apple butter and did not appear in the same book.

The photographer was back at work so it was just me and the point and shoot camera. I had the time and that is part of the enjoyment.  To have the time to shoot the photos inside and if that doesn’t work, try outside.  To take the time to create the mood and style the photo.   To have no rush, except to eat the scones still warm from the oven with a dollop of spicy apple butter on top. Bliss.


Apple butter (makes just over 2 pints or 1.4 litre)
3 ½ lb/1.6kg tart green apples
16 fl oz/450ml apple juice
1 cup white sugar
1 cup brown sugar
½ tsp ground allspice
½ tsp ground cinnamon
¼ tsp ground cloves
1/8 tsp salt
2 tbsp molasses

Peel, quarter and core the apples but don’t discard the peels or cores.  Squeeze a little lemon juice on the quartered apples to keep them from browning. 

Place just the peel and cores in a saucepan with the apple juice and simmer gently for about 30 minutes.  Strain the juice and discard the solids.

Add the quartered apples and the remaining ingredients to the juice and simmer, stirring often, until the apples are very soft.  Press the mixture through a fine sieve or puree in a blender.

Continue cooking the apple butter over a low heat, stirring often, until it is very thick and smooth.  Spoon into hot, sterile jars leaving about 1/3 in/8mm of a gap between the mixture and the top of the jar, and seal.


Sultana scones
Makes about 8-10 scones

2 cups self-raising flour
2 tsp sugar
pinch salt

1¾ oz/50g butter, cold, diced finely or grated
½ cup sultanas
1 cup milk, approximately

Pre-heat oven to 230°C

Grease a baking tin or line a tray with baking paper.

 Sift the flour, sugar and salt into a bowl.

Rub in the butter with your fingertips until the mixture resembles fine breadcrumbs.  Add sultanas and mix gently to combine.

Make a well in the centre of the mix and pour in most of the milk.  Using a wide knife (I use a palette knife), mix together to a soft, sticky dough.  Add more milk from your measure if the mixture is not sticky enough.

On a lightly floured board or surface, gently knead the dough and press out to ¾ inch/2cm thickness.

Using a flour dusted cookie cutter or knife, cut the dough into desired shapes and place the scones close together (almost touching) on the tray or tin.  Brush the tops with a little extra milk.

Bake for 10-15 minutes until the tops are golden and cooked through – the scones should sound hollow when tapped with your fingertips.

Serve with some real butter and a dollop of apple butter.

Scones are best served warm and on the day they are made.  However they can be frozen. 
Wednesday, March 16, 2011

know your onions


I once had a checkout operator at the local supermarket pick up a red onion from my groceries on the conveyor belt and ask me what it was.  I recovered from that Jamie Oliver moment where I was stunned into silence that someone did not recognize a fairly common vegetable, and told her.  She asked what you would do with it.  After that, I picked her checkout every time.  I truly liked her innocence.  It made going to the supermarket a much more rewarding experience.  She never failed to ask me questions about produce I had bought or comment on how much wine I had in my shopping trolley and was I going to drink it all myself. (I wasn’t!)  Sadly, she is not on the checkouts anymore.  I hope it was an educational experience for her.

What’s been an educational experience for me is watching the onion pickers out here in the produce belt. They spend hours from daybreak to sunset  lifting the onions from the earth. Inside the house you can hear the hypnotic clicking sound as the pickers move slowly down the rows, hand clipping the onion tops off. Sometimes, it’s like an art form. The picked and clipped onions are placed on the earth in groups. Gradually a line forms as they are laid out to dry in the sun (this apparently kills the root system at the bottom of each bulb). And finally, there is row upon row of bagged onions waiting to be collected. It’s a beautiful sight - a photo begging to be taken.


I love ...

oven baked red onions and vegetables
sliced raw red onions with cheese in toasted sandwiches
raw red onions in salads – sweet and juicy, adding colour


I tried making onion marmalade for the first time. It turned out fine - a little sweet for me perhaps, but others liked it. Later I saw a recipe on the BBC website. From the photo, it looked like their onions had held their glorious red colour (perhaps they'd just Photo-shopped it?).  I'll try it sometime and let you know...

This one is adapted from a recipe in Fruits of the Earth by Gloria Nicol.

red onion marmalade

1kg (2lb 4oz) red onions, peeled, quartered and then sliced
2 tbsp olive oil
250ml (17fl oz) red wine vinegar
250ml (17fl oz) balsamic vinegar
750g (1lb 10oz) muscovado sugar (or a dark brown sugar)
2 bay leaves
2 tsp salt
ground black pepper

  1. Heat the oil in a large stainless steel pan or preserving pan.  Add onions and cook gently for about 20 minutes until soft but not browned.
  2. Add all other ingredients and simmer gently for 1-1½ hours until mixture is dark and thick but still juicy, stirring occasionally.
  3. Pour the marmalade into hot, sterilized jars and seal.

Tip
I wash the jars in hot soapy water, then rinse. While still wet, I place them in the microwave for 1 minute to sterilize. I pour boiling hot water over the lids and any utensils I will be using to spoon the preserve into the jars. I tend to use a mini ladle for this.


I've been having a hard time posting this blog.  The formatting keeps previewing all wrong.  Now, I don't know if this is me or Blogger.  So, if you're looking at it and it looks kind of funny - I've given up and gone to bed!