Showing posts with label coconut. Show all posts

Saturday, May 16, 2015

Chocolate, Raspberry & Coconut Slice


It pays to have your eyes tested before reading a recipe.  Lesson learned after I delivered these with a third of the amount of raspberry jam filling required.  That was after checking the recipe twice (I'm blaming the ratio of distance from eye to cookbook!) and not following my own intuition when it spread as a thin layer on the base. Luckily, after they'd cooled I was able to slice the base horizontally and add more jam to each individual slice. It made all the difference to the balance of tastes.

These slices are based on the Louise slice - a base layer of cake topped with raspberry jam and coconut meringue - and given a twist for chocoholics with a chocolate cake base and coconut and chocolate meringue. 

If the thought of three layers troubles you, don't worry, this was a breeze to make. The only strenuous chore was grating the chocolate. I thought there must be a better way but didn't find anything worthwhile on Google - so if you have any tips, let me know. At least it was cold and didn't melt in my hand as it did in summer.

I added a dusting of freeze-dried powder to give a tart burst of raspberry flavour in contrast to the sweetness, plus it looks rather vibrant.

The recipe comes from Fiona Smith in the Treasury of New Zealand Baking (edited by Lauraine Jacobs). It's a keeper of a cookbook full of delicious and reliable recipes.


Chocolate, Raspberry & Coconut Slice

125g butter, softened
1 cup sugar
3 eggs, separated
1 1/2 cups standard flour
2 tbsp cocoa powder
3/4 cup raspberry jam
100g dark chocolate, grated
1/2 cup desiccated coconut

Optional: freeze-dried raspberry powder

Preheat the oven to 180 degrees C.

Grease and line a 18x28 cm baking tin.

Cream the butter and half the sugar in a cake mixer until light and fluffy.  Beat in the egg yolks, one at a time until incorporated. 

Sift the flour, cocoa and baking powder together and mix into the creamed butter and sugar. As it's quite crumbly, I found the easiest way to do this was to do a short burst on slow whisk to incorporate everything.  Press the mix into the prepared tray. Spread the raspberry jam evenly over the base.

In a separate bowl, beat the egg whites to soft peaks, then slowly (about a tablespoonful at a time) beat in the remaining sugar until stiff. Fold in the grated chocolate and coconut. Using a palette knife or spatula, spread the meringue mixture evenly over the top.

Bake for 30 minutes or until meringue is golden and firm to touch.

Cool in the tin.  Remove from the tin carefully and cut into squares or slices.  Dust a little freeze-dried raspberry powder over the top of the cakes.


Makes about 16 squares.  Keeps for up to 3 days in an airtight container.

Saturday, July 12, 2014

Energy Balls


I have become quite addicted to these, taking them to work each day to have at morning coffee break. 

Like a lot of things in life, I’ve come to these late.  By some kind of osmosis I’ve gone from barely noticing them in café cabinets to realizing that people everywhere are making, buying or eating them. They have now seeped into my skin and I am habitually whizzing up some form of them to substitute for a muffin, which I’m presuming is a good thing, right?

I store them in the freezer and drop one in a ziplock bag on my way to work.  I favour eating them straight from the freezer as they’re chewy and dense and the eating sensation lasts just that bit longer.  Once they come to room temperature they’re softer and therefore disappear faster. 

A colleague makes a blockbuster chocoholic version of these.  Gigantic, fudgy spheres with, wait for it, a surprise square of chocolate in the centre (think Caramello or other flavoured squares of chocolate bars). Full on.

I’ve gone for a more restrained version that you can be all virtuous about eating (although, as with most things, in moderation).  Whilst it’s not a quite the same as a chocolate hit, they do deliver enough of a consolation and they are so easy to make.

These treats bear some oddball names such as amaze balls (although I think that’s actually a brand?) and the more frequent bliss balls.  Well I have to say that just sounds a bit dodgy and reminds me (not in a good way) of David Beckham’s moniker Golden Balls!  Enough of that – I’ll stick with energy balls, thank you.

Energy Balls

16 pitted and chopped dates (Medjool dates are best)
1/2 cup brazil nuts
1/2 cup almonds
2 tbsp good quality cocoa powder

zest and juice of 1 orange
a pinch of sea salt (optional)

½ - ¾ cup desiccated coconut for coating
If you’re not a fan of coconut, roll them in crushed nuts or sieved cocoa powder.

Use this recipe as a base but the possibilities are endless.  Substitute the fruits and nuts shown for other dried fruit (apricots instead of dates) and nuts; add different flavourings – after reading The Kitchen Maid’s version, I’ve taken to adding a teaspoon of orange blossom water to mine. 
If you can’t get Medjool dates (and you really want to as they are soft and thick with a sweet taste), soften hard dates (or apricots) by heating in a little water (or the juice of the orange from the recipe). If you use a little water, you won’t have to drain but to be on the safe side set aside any drained water in case you need to add to the mixture.


Grind the nuts in a food processor until fine.
Add the dates, cocoa powder, orange zest and juice and salt.
Process the mixture in the food processor until it is smooth and forms a ball.
Roll into walnut or golf-ball sized balls (your choice – I started with walnut and upsized to golf-ball.  I used a mini-ice cream scoop to measure out the balls.)
Spread the desiccated coconut on a plate and coat the balls in it.
Refrigerate for at least an hour before serving.
Store in the fridge for about 2 weeks or in the freezer.


Monday, March 17, 2014

Fudgy Chocolate Macaroons


Not to be confused with the highly popular macarons (although it can be quite confusing as macarons are also known as macaroons), I'm distinguishing them like this - French macarons for coloured meringue discs sandwiched with filling and macaroons for chewy coconut  confections with a crispy outer.

I never took a liking to the plain coconut macaroons which were usually pyramid shaped morsels with toasted coconut on the outside but these ones are on chocolate overload and are really something. If you can imagine a meringue based brownie you'd be close to the taste and texture of these - fudgy, chewy chocolate and coconut covered with a crisp baked outer shell. Highly addictive.

Fudgy Chocolate Macaroons

Makes 16-18

250g good quality dark chocolate (72% or more cocoa)
2 egg whites
a pinch of salt
3/4 cup caster sugar
1 tsp vanilla essence
2 cups coconut (best with long thread coconut but you can substitute desiccated coconut)

Preheat oven to 150 degrees C.  Line a large tray with baking paper.

Chop or break the chocolate into small chunks and place in a heatproof bowl over a saucepan of simmering water (don't let the water touch the base of the bowl or let it splash onto the chocolate).  Stir frequently until the chocolate is melted.  Put aside to cool.

Place the egg whites, salt and 1/2 cup of the caster sugar into the spotlessly clean (no grease!) mixing bowl of your cake mixer and, using the whisk attachment, whisk until stiff.  Add the remainder of the sugar about a heaped tablespoonful at a time, whisking each addition for a few minutes.

Turn your cake mixer onto lowest setting and briefly mix in the vanilla and melted chocolate. Using a metal spoon, fold in the coconut carefully.


Place small scoops onto the baking tray.   I used a mini ice cream scoop which holds just over a tablespoon of mix, depends on how big you want the macaroons.  I think next time I'd go with just using a spoon to get a more rustic look at these were too rounded for my liking.

Bake for approximately 15-20 minutes until crisp on the outside but soft and chewy in the centre.

I'm sharing these with Sweet New Zealand hosted this month by Frances at Bake Club.


I'm also pleased to be participating in We Should Cocoa as this has been on my food blogging To Do list since, oh I don't know how long.  We Should Cocoa is also a monthly food blogging event all about chocolate and whatever other ingredient the guest hosts come up with.  This month's host I'd Much Rather Bake Than ... has chosen coconut so it seems I am lucky in that all my stars converged (drum roll, please) resulting in my first ever entry.


And if you want more chocolate and coconut loveliness, don't miss this previous post - another favourite of mine!

Chocolate Date Slice


Friday, December 13, 2013

Semolina, Coconut + Marmalade Cake


If you ever get fed up smelling the roses, try orange blossom water instead.  Gorgeous.  I’ve been inhaling the heady scent since dousing these cakes with it.  And in case that’s not enough, you can flavour the yoghurt with it too.

I took one of these loaves along to our December book club’s pot luck dinner. It was a lovely way to end our year of book club sessions – wine, food and conviviality.

The cake is about as simple as it can get – whisk the wet, stir the dry, mix together, pour into tins and bake.  It has that thick open texture you normally get with such cakes. The marmalade gives it a slight bitterness but it’s the orange blossom that gives it the edge in flavour and aroma.

Semolina, coconut & marmalade cake

From Jerusalem by Yottam Ottolenghi & Sami Tamimi

Makes two 500g loaves.  If you want to make a 1kg loaf, increase cooking time by a further 20-30 minutes.

180ml rice bran oil
240ml fresh orange juice
160g orange marmalade (fine cut or without peel)
4 eggs
grated zest of 1 orange
70g caster sugar
70g desiccated coconut
90g standard flour
180g semolina
2 tbsp ground almonds
2 tsp baking powder

Soaking Syrup

200g caster sugar
140ml water
1 tbsp orange blossom water


Preheat oven to 180°C/160°F. 

Grease and line two 500g loaf tins with baking paper.

In a bowl, whisk together the oil, orange juice, marmalade, eggs and orange zest until the marmalade dissolves.

In a separate bowl, mix all the dry ingredients and add to the wet.  Mix until well combined – it will be quite runny. 

Divide the filling between them.  Bake for 45-60 minutes, or until a skewer inserted in the middle comes out clean.  They should be orangey-brown on top.

Near the end of baking time, place the syrup ingredients in a small saucepan and bring to the boil.  Remove from the heat. 

As soon as the cakes come out the oven, brush them with the hot syrup using a pastry brush.  Do this several times, leaving the syrup to soak in before applying again, until all the syrup is used.  You’ll enjoy this as the perfume wafts into the air.

Once the cakes have cooled down a little, remove from the tins and leave to cool completely.

Serve with coconut yoghurt or Greek yoghurt flavoured with a drop of orange blossom water.


Like citrus?  Try my favourite lemon cake of all.


Friday, October 18, 2013

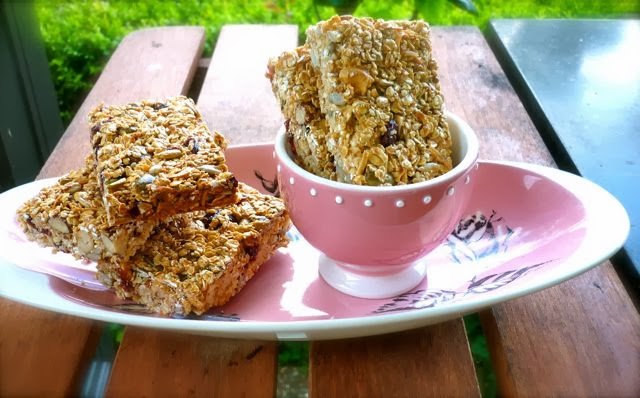
Munchy Muesli Bars


I thought the other half might appreciate these muesli bars to have on the run. He’s the (very) early riser and heads to work whilst most of us are probably deep in sleep. 

They are fairly nutritious, so easy to make, store well and you can pop them in a plastic bag or container to take to work or eat en route (providing you don’t make a mess in the car!). 

The recipe is from Nigella’s website here but I have adapted it slightly to use a mixture of my favourite nuts as I’m not a fan of peanuts (except for some bizarre current craving for Peanut M&Ms), so here’s my version below. (I also seem to get way more bars than she does.)

I have done muesli bars before but it’s been a while so I can’t really say which ones I prefer.  So you choose whether you want this healthier version which is bound together with sweetened condensed milk or the all out earlier ones which used sizeable quantities of butter, sugar and golden syrup to bind, along with a lot more dried fruit. 

When the tin was empty, Bill was left with the shop bought ones (which, I have to point out, he brought home) and it was a case of “after you’ve tried the homemade, you don’t want to go there…

Looks like a regular order then. Think I will have to make both recipes to see how they compare.

Nigella’s Breakfast Bars

1 x 395g tin sweetened condensed milk
250g rolled oats
125g mixed nuts (I used a mix of brazil nuts, cashews, almonds and hazelnuts)
50g pumpkin seeds
50g sunflower seeds
25g sesame seeds
100g dried cranberries
75g thread coconut

Preheat oven to 130 degrees C (250 F).

Grease a baking tray approximately 23 x 33 cm (9 x 13 inch). 

Line the bottom with baking paper.

Warm the sweetened condensed milk in a saucepan.

Meanwhile, mix together all the other ingredients and then add the warmed, condensed milk

Spread the mixture into the tin and press down with your hands – I use a stainless steel pastry scraper to press down evenly across the surface.

Bake for 1 hour.  Remove from the oven and leave for 15 minutes.  Cut into squares or bars – makes about 16-20 (maybe more) depending on what size you prefer.

Leave to cool completely and transfer to a tin.


Friday, May 31, 2013

No-bake Chocolate Slice


My friend is rather partial to Altezano’s chocolate fudge slice and on Sundays she often takes home a bite as her wicked chocolate treat for working Mondays.  I reckoned I could make something similar (although as a disclaimer I have to say I haven’t actually tasted Altezano’s, just gazed upon it at the counter) and found this recipe on the Women’s Weekly website. 

I’ve made it three times in about as many weeks and feedback has been most favourable, even when said friend compared it with Altezano’s.  I love the chewy raisins and the balance between the crumbly base and smooth chocolate topping.  A real cure for Mondayitis.

I did promise the recipe after making it for some participants of a photography workshop held here at our house last weekend, so here it is.  I should point out that the experienced photographers did not take the photo - that was left to amateur me – but thanks to Eva for some pointers.

No-bake chocolate slice

175g butter

3 tbsp golden syrup

1 tsp vanilla essence

3 tbsp cocoa powder

1 250g packet digestive biscuits

½ cup desiccated coconut

½ cup raisins

250g dark chocolate melts* (or chopped chocolate) for topping
* I used Cadbury Melts

Line a 17cm x 27cm slice tin with nonstick baking paper.

Crush the biscuits in a food processor (or place in a plastic bag and beat with a rolling pin until crushed).

Place butter, golden syrup and vanilla in a saucepan and heat until butter has melted.  Stir to combine.

Add cocoa, crushed biscuits, coconut and raisins and stir to combine. Press firmly and evenly into the base of the prepared tin.  Set aside.

Topping

Place chocolate melts in a heatproof bowl over a saucepan of simmering water to melt. Stir until smooth.  Spread over the surface of the slice to coat evenly. Leave for an hour or so to set. Cut into bars or squares with a hot knife.

Store in an airtight container.

Saturday, February 2, 2013

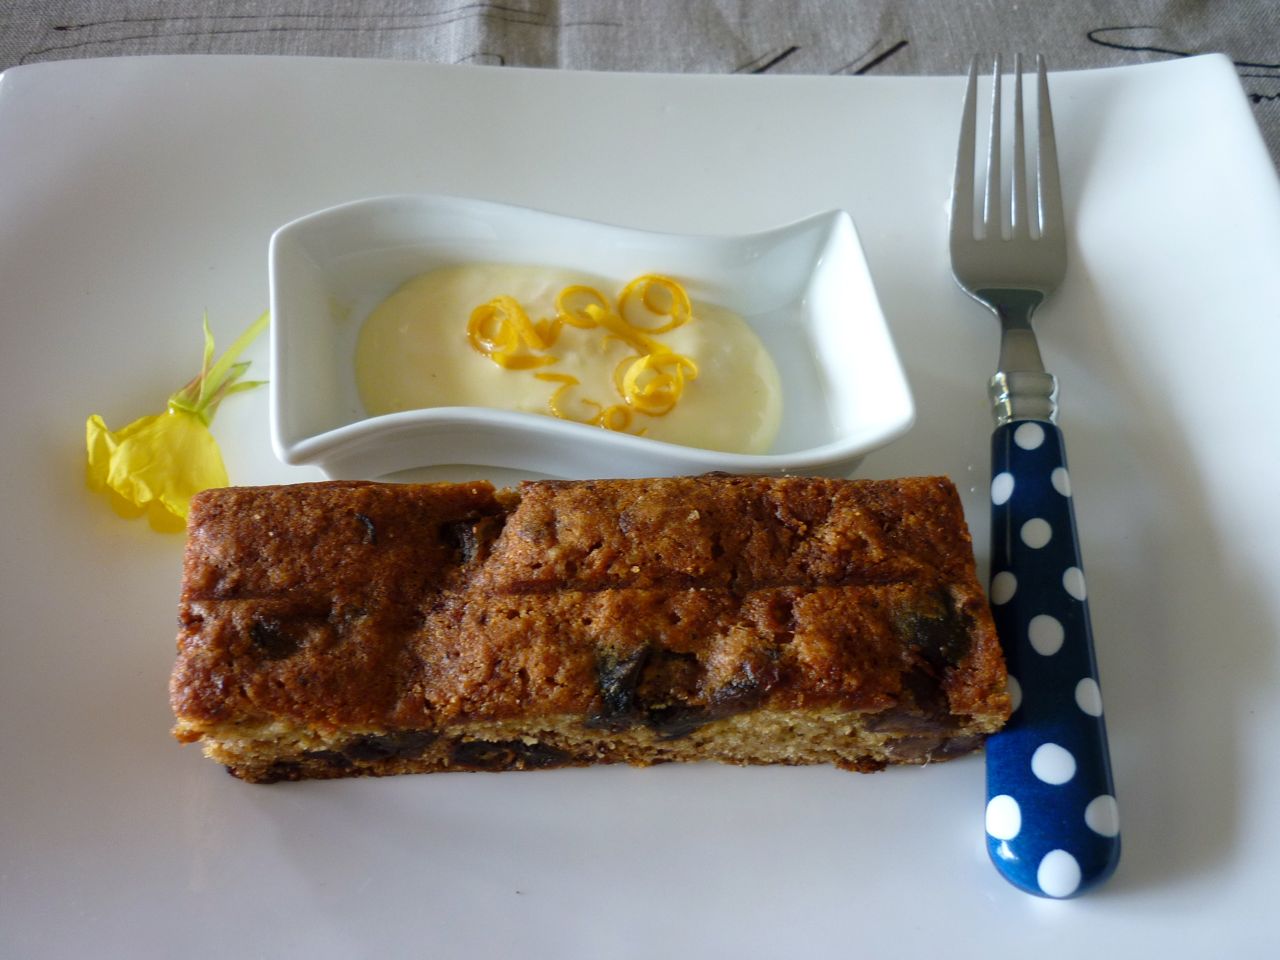
Date Cake with Lemon Curd & Coconut Yoghurt


This is the second time I have made this cake in as many weeks.  The first was a way to cope with being back at work after a long, summer break.  A touch of sweetness as we attempted to clear a backlog of emails; nudge oneself back into focus every so often and remember what our passwords were. Yes, the return to work needs a gentle ease-in, no hard or stupid questions please, my withering look is not on leave now either. Good thing there are a few public holidays to shorten our first few weeks.

It’s worth buying the more expensive Medjool dates for this cake for they are softer and lusher.  I used half Medjool and half packaged pitted dates both times.

I left the cake un-iced on both occasions.  The original recipe uses a cream cheese icing or suggested a lemon icing but I found it worked well enough without either and first day back at work, there was no time to make icing of any sort.  It was hard enough just getting my act together to get out the door on time.

First time around I was pretty amazed when Bill handed me a slice on which he'd lathered a dollop of coconut yoghurt on top.  It was truly a winning combination with the coconut totally complementing and enhancing the dates and spiciness of the cake.  

For this one, I've used coconut yoghurt and swirled in some homemade lemon curd (recipe here).  Except in today’s heat the swirl spun out of control and merged into the yoghurt during the photo shoot (temperamental model I'd say).

The recipe comes from Catherine Bell in the wonderful A Treasury of New Zealand Baking.  The yoghurt I used was Coconuts from The Collective (and yes, there is an extra "s" in their naming of the yoghurt).

Date Cake with Lemon Curd & Coconut Yoghurt

­
250g pitted dates, chopped
1 teaspoon baking soda
125ml boiling water
110g butter, softened
110g caster sugar
finely grated zest of 1 lemon
1 egg
150g standard flour
½ teaspoon baking powder
1 teaspoon mixed spice

Put the dates and baking soda in a small bowl, pour in the boiling water and mix together briefly with a spoon.  Leave for 30 minutes to cool.

Preheat oven to 150°C.  Grease and line a 20cm round or square cake tin with baking paper.

In a cake mixer, cream the butter, sugar and lemon zest together until pale and creamy.  Add the egg and beat well.

Sift the flour, baking powder and mixed spice into a bowl ensuring well combined.  Add half of this dry mix, along with half of the date mix to the creamed ingredients.  Fold in gently until combined and repeat with the remainder. 

Place the mix into the prepared tin and bake for approximately 45 minutes – test the centre with a skewer which should come out clean.

Cool in the tin for 5 minutes then remove to a wire rack to cool completely.

Serve with the lemon curd & coconut yoghurt below or top with a lemon icing.

Lemon Curd & Coconut Yoghurt

For each slice of cake, mix 2 tablespoons of coconut ­yoghurt with ½ tablespoon of lemon curd swirled in.  Garnish with lemon zest and serve either on the plate or in a little dish beside the cake.


Saturday, August 4, 2012

lemon louise slice


This is what I made with some of the lemon curd from last week.  Louise slice or cake is a shortcake base with a layer of jam or curd and topped with coconut meringue.  It seems it is a very popular recipe here in New Zealand.

The longer you live in another country, the more blurred your memory gets.  (This is just a roundabout way of saying I am getting older!).  Sometimes I can’t recall if we had certain foods in Scotland and it’s like that with this slice. 

I attempted to make Neenish tarts once (I say attempted because I stuffed up and threw the lot out) and at the time imagined they were Irish, but I was probably thinking of a place we’d visited in Ireland called Neenagh and mixed the two up.  Hmmm.

What I do know is that I have baked Louise Slice twice, once with a filling of raspberry jam and now with lemon curd.  I have to say, the lemon curd is more my thing.  The lemon cuts through the sweetness of the slice and gives it a bite that you don’t get with the raspberry jam.

I’ve got this thing about not liking store-bought raspberry jam.  I find it too sweet but I don’t often see home-made raspberry jams.  Maybe I should add raspberry plants to my garden of forgotten foods?  Maybe not….

Whilst I enjoyed this Louise slice, it would not be at the top of my favourites list but it does make a nice treat for afternoon tea.

lemon louise slice

Base
130g standard flour
½ tsp baking powder
a pinch of salt
75g butter, softened
45g sugar
2 egg yolks

Filling
¾ cup lemon curd

Meringue topping
2 egg whites
120g caster sugar
60g coconut thread (or use desiccated coconut)


Line a baking or swiss roll tin (approximately 25cm x 16cm) with baking paper, letting it hang over the edge for easy removal of the slice.

Sieve the flour, baking powder and salt into a bowl.

With a cake mixer or hand electric mixer, cream the butter and sugar until light and fluffy, using a spatula to scrape the mix off the sides of the bowl 2 or 3 times.  Beat in the egg yolks, one at a time, until well incorporated.

Add the dry ingredients and mix until incorporated.  Press into the base of the tin.  I find it easier to flatten the dough between two sheets of cling wrap or baking paper and roll out to fit the tin evenly.

Spread the lemon curd over the base.

Preheat the oven to 160°C.

Beat the egg whites until stiff.  Gradually add the sugar, beating well after each addition.  Beat until stiff and glossy.  Gently fold in the coconut.

Spread the coconut meringue evenly over the lemon curd. 

Bake in the oven for about 30-35 minutes or until meringue is lightly coloured and dry.  The meringue will crack during cooking.

Remove from the oven and whilst still warm, cut into squares or slices in the tin.  Carefully transfer to a cake rack to cool completely.  (This is where your overhanging baking paper comes in handy.)


Sunday, June 12, 2011

tamarillo, apple & coconut shortcake


I dislike wasting food and I had seven dark-red, tart and flavourful tamarillos ripening by the day.  If there had been muesli, I would have halved them, sprinkled them with brown sugar and put them under the grill.  But lately there has been little time to make muesli and I have been content with my brown-sugar-sweetened porridge.

I wanted to make something sweet with them – not chutney – a pie of some sort.  I was hoping to replicate a sweet, tamarillo pie I had eaten at a café on the way to the Coromandel some years ago but couldn’t quite remember what form it took.  I had a vague idea about using coconut.

Just as the tamarillos were facing a future in the food waste bin, the rural women of New Zealand came to my rescue.  Well, one of them - in the form of a cookbook, A Good Spread – Recipes from the kitchens of Rural Women New Zealand.  Sometimes the sparseness of information in recipes from these types of books leaves me high and dry, but not this one.

I liked the idea of using dates and rum, along with the tamarillos and apples. Their flavours sweeten and mellow the tartness of the fruit. 

Initially I was going to omit the rum (recipe didn’t state whether to use light or dark). Instead, I substituted it with Malibu – it seemed a natural choice to marry with the coconut I have added to the recipe. 

I misread the recipe and added the honey and rum before bringing the mixture to a thick, pulpy texture, which is why my filling ended up runny.  I used a slotted spoon to remove the fruit without too much of the liquid.

I also forgot to take a photo of the tamarillos in their natural state.  Now that is a shame as they are so photogenic with their egg-shaped, smooth dark red skin and long dangly stems.  There will be other times for photographs though, as I will definitely make this recipe again.  It is good as a dessert or cut into squares for morning or afternoon tea.

tamarillo, apple & coconut shortcake

2 green (or cooking) apples
6 -7 tamarillos
zest of 1 lemon
juice of about ½ lemon (or use juice & zest of 1 lime)
½ cup chopped dates
¼ cup sugar
2 dessertspoons honey
2 dessertspoons Malibu (coconut-flavoured white rum)
1 teaspoon thread coconut (or use desiccated coconut)


Shortcake
125g butter
125g sugar
1 egg
225g flour
1½ tsp baking powder
1 heaped dessertspoon custard powder

Peel and thinly slice apples.  Place in a saucepan with just enough water to cover the bottom and stew until apples are beginning to soften.  Add peeled and sliced tamarillos, lemon zest and juice, chopped dates and sugar.  Cook, stirring frequently, until the mixture is soft, pulpy and thickened.  Remove from heat and add honey and Malibu.  Cool.

To make shortcake, cream butter and sugar, add egg and beat again.  Mix in sifted flour, baking powder and custard powder until combined and the dough forms a ball.  Add a little extra flour if it is too sticky.

Press half the dough into a deep, greased and lined 23cm baking or pie dish.  I used a 21cm square tin.

Spread the filling on the base (if you think the filling is too liquid, use a slotted spoon to remove fruit mix without liquid).  Sprinkle the coconut over the top.

With your fingers, pluck smallish pieces from the remaining half dough and dot all over the top.  Alternatively, you can roll the second half of dough into a log or ball, chill or freeze until firm and grate over the top.  I went for blobs of shortcake, as I just wanted it in the oven.


Bake at 180°C for 20-30 minutes or until topping is golden and cooked through.  Serve warm or cold, sprinkled with icing sugar and whipped cream. 

Adapted from a recipe by Cynthia Harfoot, Cambridge, published in A Good Spread – Recipes from the kitchens of Rural Women New Zealand.