Showing posts with label spices. Show all posts

Monday, November 9, 2015

Banana, walnut & sultana cake


I don't make banana cakes too often as I don't particularly like them. There's too many large, bland (and often dry) ones. Or else they have that slight stickiness and a none too pleasant banana smell about them. Instead I've been happier to freeze my ultra ripe bananas for smoothies instead for their luscious creaminess.

But there is one banana cake recipe I've always kept. Many moons ago one of the playgroup mothers made this cake and it's about the only one I've ever loved.  

It's not a deep, high-rise cake but sits low in the tin, is wonderfully moist, slightly spicy and has the crunchiness of the walnuts and chewy sultanas.  

Serve it as a cake but it's just as good straight from the oven as a dessert with some whipped cream or vanilla mascarpone. I like to serve it with Greek yoghurt.


Banana, walnut & sultana cake


2 bananas, peeled and chopped
1 cup walnuts, quartered
1 cup sultanas
2/3 cup soft brown sugar
100g butter, melted
1 egg
1 cup self-raising flour 
2 teaspoons mixed spice

Preheat the oven to 180 degrees C. Grease and line a 23cm cake tin.

Mix the bananas, walnuts, sultanas and sugar in a mixing bowl. 

Beat the egg and melted butter together and stir in to the banana mixture. 

Sift the flour and spices together then add them to the mix, stirring gently just to incorporate.

Bake for approximately 35-40 minutes or until the top springs back when pressed and a skewer inserted in the middle comes out clean.


Sunday, August 3, 2014

Ginger & Sultana Loaf


I'm a huge fan of very dark, sticky and spicy gingerbread and the last time I baked one, I posted it way back in 2011 here, so it's been a long wait...

Unlike the earlier gingerbread, this one won't knock your socks off, but it is a good, moist loaf with chunks of stem ginger and sultanas. If you can, use stem ginger (I used Opies Stem Ginger in Syrup which comes in a jar) as it really adds to the flavour of the loaf.  If not, leave it out (you'll still get the taste from the ground ginger) or use chopped crystallized ginger instead. 

Like most gingerbread loaves it improves with age over a week but as noted in my last gingerbread post, I've never tested that theory as nothing ever lasts that long (unless it's inedible).

And, as I've used one in my photo, let me just say how much I love hellebores or winter roses. I have little clumps of them under trees and their hidden beauty always makes me smile. One trick I learned from an English home and garden magazine was to leave the picked hellebores somewhere midway between the cold outside and warmth inside (the entrance way works for us) to let them adjust to a warmer temperature.  They then won't droop so quickly when they feel the heat. Me? I never droop in the heat - bring it on!


Ginger & Sultana Loaf

100g butter
100g dark cane (or soft brown) sugar
100g treacle
1 egg, beaten
200g plain flour
2 teaspoons ground ginger
2 teaspoons ground cinnamon
150ml warm milk
1 teaspoon bicarbonate of soda (baking soda)
50g sultanas
2 pieces of stem ginger, chopped (optional)
(I add any syrup clinging to the stem ginger too - nice & sticky!) 

Preheat the oven to 150 degrees C. 

Grease and line a loaf tin.

Place the butter, sugar and treacle in a saucepan and heat gently until melted, stirring constantly.  Allow to cool slightly, then beat in the egg.

Sift the flour and spices into a mixing bowl, then stir in the melted mixture and beat well to combine.

Mix the milk with the bicarbonate of soda and add this to the mix.  Stir in the sultanas and the stem ginger. 

Pour the mixture into the loaf tin and bake for 1 hour or until a skewer inserted in the centre comes out clean.

Leave to cool in the tin. 


Sunday, April 20, 2014

Hot Cross Buns


Had I really thought about it, I would have prepped more the night before but after a long, hard day at work I managed only to get the ingredients measured and ready for the next morning.  So the hot cross buns didn’t quite make it for morning tea but they were ready by lunchtime.

I’d been inspired to make hot cross buns after a trip to the supermarket to buy some Easter goods for a farewell at work.  The sad offerings of eight squashed, dark and inedible looking hot cross buns made me want to go and spend $3 each on some good ones but it wasn’t my money to splash around.  Of course I didn’t eat any of them, such was their lack of appeal. So what better time to try to make them myself?

I’ve had a couple of hot cross bun recipes lurking in my recipe folder for years now and chose this one from the now defunct (I think?) Notebook magazine.  I replaced the stated plain 00 flour for high-grade flour and added a pinch each of nutmeg and cinnamon.  Next time I might add a little more spice but other than that I was really happy with how they turned out.

I thought I was going to have an epic fail on piping those crosses but I was surprised at how easy it was.  I think last week’s Easter cupcake icing was still fresh in my mind.

What really amazed me was how excited I was the whole morning it took me to do them (don’t be put off, there’s a lot of down time for the dough in there).  Isn’t it great to be excited about something? I’ve missed that!


Hot Cross Buns

Makes 16 

1½ cups (375ml) warm milk
2 tsp (7g) dried yeast
¼ cup (55g) caster sugar
60g butter, melted
1 egg, lightly whisked
4½ cups (675g) high-grade flour
1 tsp salt
3 tsp mixed spice
a pinch each of ground cinnamon and nutmeg
1 cup (170g) sultanas
¼ cup (45g) currants
¼ cup (50g) mixed peel
1/3 cup (80ml) cold water
Glaze: ½ cup (170g) apricot jam

Combine the milk, yeast and 1 tablespoon of the sugar in a measuring jug.  Set aside in a warm, draught-free place for 10 minutes or until frothy (I use the hot water cupboard for this.)

Once the above is ready, add the melted butter and egg to the mix and whisk to combine.

In a large bowl or cake mixer bowl, sift together 4 (600g) cups of the flour  (keeping the remainder for the paste for the crosses), salt and spices then mix in the sugar.  Add the sultanas, currants and mixed peel and stir to combine.  Make a well in the centre, pour in the milk mixture and stir to bring the dough together.  If you’re kneading by hand, turn the dough onto a lightly floured surface and knead for 10-15 minutes.  Alternatively, using the dough hook attachment on the cake mixer, turn the mixer to a slow speed and knead for 10 minutes or until the dough is smooth and elastic. 

Place the dough in a bowl, cover with a damp tea towel and transfer to a warm, draught free place for 1 hour or until the dough doubles in size.

Preheat the oven to 200°C.  Grease and line a 23cm square cake tin (I used two smaller ones).  Punch the dough down with your fist.  Turn onto a lightly floured surface and knead for 2-3 minutes or until it is smooth and elastic.

Divide dough into 16 even pieces and shape each into a ball.  Place them close to each other in the tin(s), then set aside for 30 minutes in (yes, you guessed!) a warm, draught free place until dough has risen 2cm.

Mix the remaining flour and water together to form a smooth paste.  Place in an icing bag with small round piping nozzle or in a plastic bag with the end snipped off.  Pipe a continuous line down the centre of each row of buns, lengthways and widthways, to form crosses.

Bake the buns for 10 minutes at 200°C.  Reduce heat to 180°C and cook for a further 20 minutes, until dark golden and cooked through.  The buns will be ready when they sound hollow when tapped on the base.

Use the baking paper to lift them onto a wire rack to cool. 

Meanwhile, heat the apricot jam over a high heat in a small saucepan. Cook, stirring, for two minutes until jam melts.  Sieve the jam into a small bowl and brush the tops of the hot cross buns with it.

Leave to cool.  Serve with butter and/or jam.  They are also very good toasted. 

These are best eaten on the day. The buns themselves were fine the next day but the crosses hardened so I removed them (they just lifted off, still leaving a cross indent).


Friday, July 5, 2013

Pear & Walnut Gingerbread Cakes


When someone asked me for a recommendation for a dessert recently this one tripped off my tongue with no hesitation.  Spicy gingerbread, pears and warm butterscotch sauce are just the perfect combination for a winter pudding. I’ve been making this one since I first discovered it in Cuisine magazine seven years ago. 

After passing the recipe on to said friend, I then hankered to bake it myself.  That said, there was no foreseeable need for a large cake in our mini-household of two.  So I fell back on my tried and trusty Plan B – make smaller cakes!  The beauty of this was that those not consumed immediately are ready in the freezer for those days when I can’t resist something sweet with coffee (every day, then?).

The recipe given is for the entire cake and I urge you to make it whole.  The finished cake looks amazing with a circle of halved pears drizzled with butterscotch sauce.

However, if you want to make the smaller cakes, use lightly greased friand or cupcake tins.  I halved the recipe (and used one pear instead of three) and instead of creaming the first portion of butter and sugar to line the tin, I creamed all the butter and sugar (without adding any extra ingredients at this first stage) and dropped in about a teaspoon to line each friand mould. Into each tin, I placed two slices of pear. I omitted the walnut halves completely.  I then added the remaining ingredients (including the walnut pieces) to the creamed butter and sugar and continued as per the recipe stated.  I cooked the cakes for about 20 minutes.  Just test them by pressing lightly on top with your fingertips or inserting a cake skewer in the centre.  The halved recipe made about seven little cakes.

And as for the butterscotch sauce - who could resist it?  Well apparently I could after I failed to make it properly on this occasion.  I think I may have overcooked it as it hardened immediately when it was poured over the pudding.  Resembling wax drips from a candle I was then able to lift it off completely, looking like a toffee-coloured, plastic mould.  Oh well, fortunately the cakes were just divine even without the sauce.


Pear & Walnut Gingerbread Pudding with Butterscotch Sauce

Serves 6-8

210g butter
250g muscovado sugar
3 ripe pears, peeled, halved & cores removed (with a melon baller if you have one)
6 walnut halves
2 eggs
2 tablespoons treacle
250g flour
1/2 cup walnut pieces
1/2 tsp baking powder
2 tsp bicarbonate of soda
1 tbsp ground ginger
1/2 tsp each ground cinnamon and cloves
150ml warm milk

Preheat the oven to 175°C.

Cream 60g of the butter and 90g of the sugar and spread over the base of a 24cm-diameter cake tin.

Place the pear halves, core side down, on top of the creamed butter and sugar. Dot the walnut halves in between the pear halves.

Cream the remaining butter and sugar then beat in the eggs and treacle. Stir in remaining ingredients until well mixed but do not beat. Pour the mixture over the pears and walnuts.

Place in the oven and bake for 50-60 minutes or until you can tell the pears are tender when a skewer slides easily through a pear half to the bottom of the tin and the middle of the pudding batter is cooked.

Serve with the hot butterscotch sauce and a dusting of icing sugar.

Butterscotch sauce
240g caster sugar
240g brown sugar
2 tbsp golden syrup
250ml cold water
1½ tbsp butter
½ tsp vanilla essence

Put the sugars, golden syrup and 150ml of the cold water into a saucepan and bring to the boil, stirring to dissolve the sugars and syrup.

Once boiling, stop stirring and boil until a little dropped into a glass of cold water forms a soft ball (5 minutes).

Remove from the heat, add the butter, the remaining water and vanilla and mix well, but do not beat.

Cool. It will become quite hard and crystallize once cold.

Just before serving, bring to the boil to melt and dissolve any sugar crystals.


Recipe from Ray McVinnie
Cuisine magazine Issue 111, July 2005


Saturday, February 2, 2013

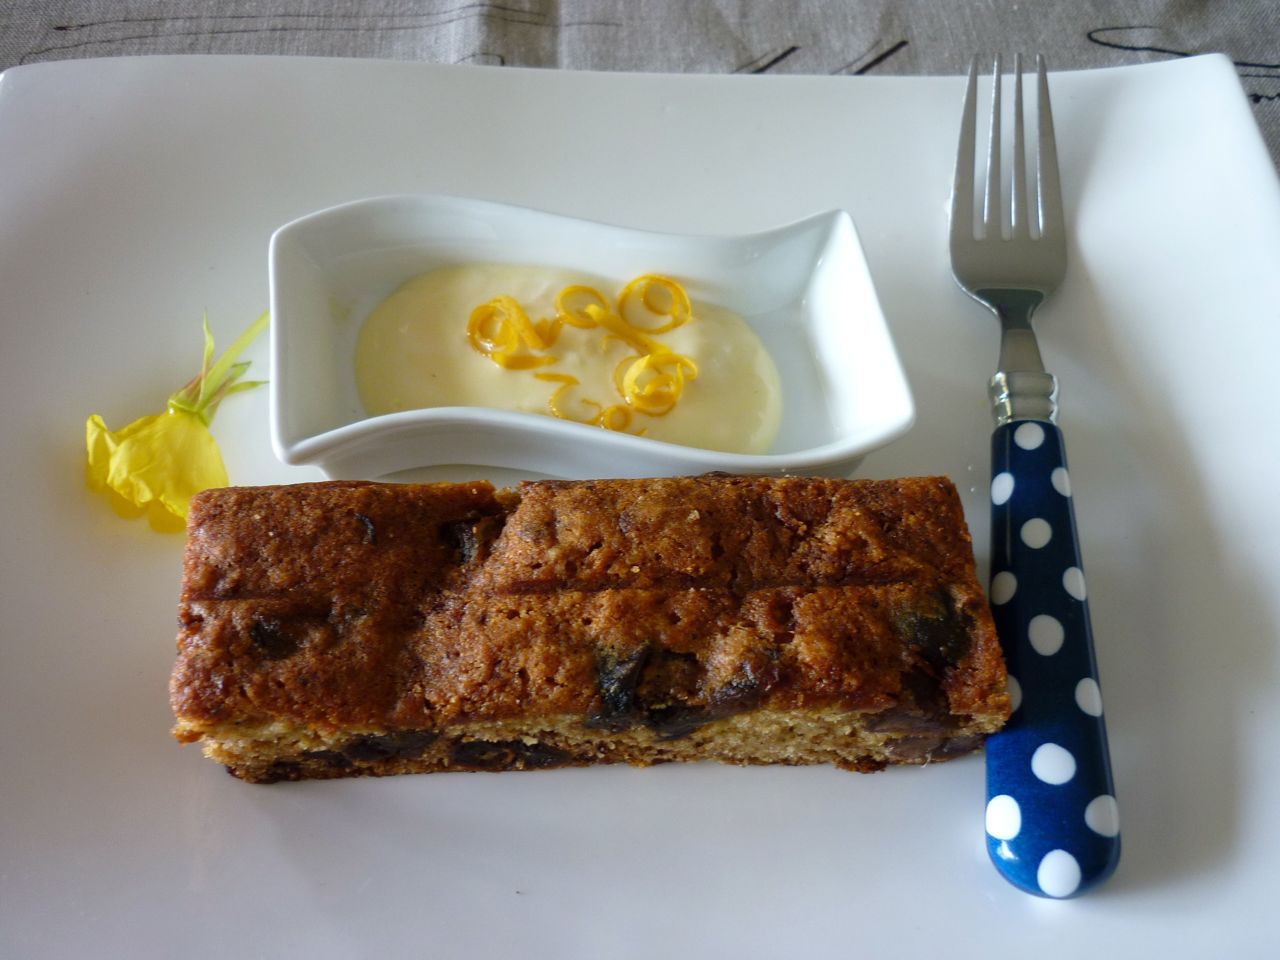
Date Cake with Lemon Curd & Coconut Yoghurt


This is the second time I have made this cake in as many weeks.  The first was a way to cope with being back at work after a long, summer break.  A touch of sweetness as we attempted to clear a backlog of emails; nudge oneself back into focus every so often and remember what our passwords were. Yes, the return to work needs a gentle ease-in, no hard or stupid questions please, my withering look is not on leave now either. Good thing there are a few public holidays to shorten our first few weeks.

It’s worth buying the more expensive Medjool dates for this cake for they are softer and lusher.  I used half Medjool and half packaged pitted dates both times.

I left the cake un-iced on both occasions.  The original recipe uses a cream cheese icing or suggested a lemon icing but I found it worked well enough without either and first day back at work, there was no time to make icing of any sort.  It was hard enough just getting my act together to get out the door on time.

First time around I was pretty amazed when Bill handed me a slice on which he'd lathered a dollop of coconut yoghurt on top.  It was truly a winning combination with the coconut totally complementing and enhancing the dates and spiciness of the cake.  

For this one, I've used coconut yoghurt and swirled in some homemade lemon curd (recipe here).  Except in today’s heat the swirl spun out of control and merged into the yoghurt during the photo shoot (temperamental model I'd say).

The recipe comes from Catherine Bell in the wonderful A Treasury of New Zealand Baking.  The yoghurt I used was Coconuts from The Collective (and yes, there is an extra "s" in their naming of the yoghurt).

Date Cake with Lemon Curd & Coconut Yoghurt

­
250g pitted dates, chopped
1 teaspoon baking soda
125ml boiling water
110g butter, softened
110g caster sugar
finely grated zest of 1 lemon
1 egg
150g standard flour
½ teaspoon baking powder
1 teaspoon mixed spice

Put the dates and baking soda in a small bowl, pour in the boiling water and mix together briefly with a spoon.  Leave for 30 minutes to cool.

Preheat oven to 150°C.  Grease and line a 20cm round or square cake tin with baking paper.

In a cake mixer, cream the butter, sugar and lemon zest together until pale and creamy.  Add the egg and beat well.

Sift the flour, baking powder and mixed spice into a bowl ensuring well combined.  Add half of this dry mix, along with half of the date mix to the creamed ingredients.  Fold in gently until combined and repeat with the remainder. 

Place the mix into the prepared tin and bake for approximately 45 minutes – test the centre with a skewer which should come out clean.

Cool in the tin for 5 minutes then remove to a wire rack to cool completely.

Serve with the lemon curd & coconut yoghurt below or top with a lemon icing.

Lemon Curd & Coconut Yoghurt

For each slice of cake, mix 2 tablespoons of coconut ­yoghurt with ½ tablespoon of lemon curd swirled in.  Garnish with lemon zest and serve either on the plate or in a little dish beside the cake.


Tuesday, December 25, 2012

Ottolenghi's roasted vegetables with tahini dressing, za'atar and pine nuts


For me, birthdays are definitely something to be celebrated.  As one gets older though, the celebration is a double-edged sword.  Whilst I’m happy to celebrate the occasion, I’m not so fond of acknowledging (or should I say ignoring?) some of the other physical or mental aspects that come with another year.  But whilst I breathe and remain in good health, I have something to celebrate, so I will. 

I was planning on sharing my birthday cake with you (the recipe that is, the cake is all but gone) but running two chocolate posts consecutively at this time of year seemed like over indulgence, even to me.  So here’s one of the dishes served at my birthday lunch last Sunday (yes, I was almost a Christmas baby). 

If you’re very lucky (like me) you may just have received Jerusalem by Yotam Ottolenghi and Sami Tamimi as a Christmas present (mine was a birthday gift). 

Although I had a small box of za’atar spice, it was past the sniff-by test.  So I quickly threw some spices and herbs together using this Internet recipe  as inspiration.  It’s worth making fresh as the smell and taste is far superior than the bought blend.  I had no fresh oregano so substituted fresh thyme, which I finely chopped and added to the spices.  Coincidentally that same night, I watched Jamie Oliver’s American road trip programme.  Jamie was in New York making za’atar with an Egyptian chef and I noticed the ingredients differed slightly again.  That made me feel better.

Inhaling the spice gave me a real zing so I was not at all surprised when the dish turned out to be my favourite of the day.  I just loved that the tahini dressing, za’atar and toasted pine nuts not only made the roasted vegetables look exotic, they tasted sensational too.  And this is just the first recipe I’ve tried.  More please...

I served the pine nuts on the side as my daughter has a nut allergy.

For the recipe, click this link to the original recipe on The Guardian website.  

One last thought – I can’t believe I’m writing a blog post on Christmas Day.  Merry Christmas!